How to Ship Clothes on Depop in 2026: Labels, Packing, and Tracking
To ship clothes sold on Depop in 2026, choose the correct shipping method shown for your order, protect the garment in suitable packaging, use the label exactly as instructed, and keep valid tracking evidence until the transaction is complete. The precise label provider, postage options, and seller responsibilities can vary by country and by the shipping method selected in the Depop app, so always follow the order details and the latest Depop Help Centre instructions.
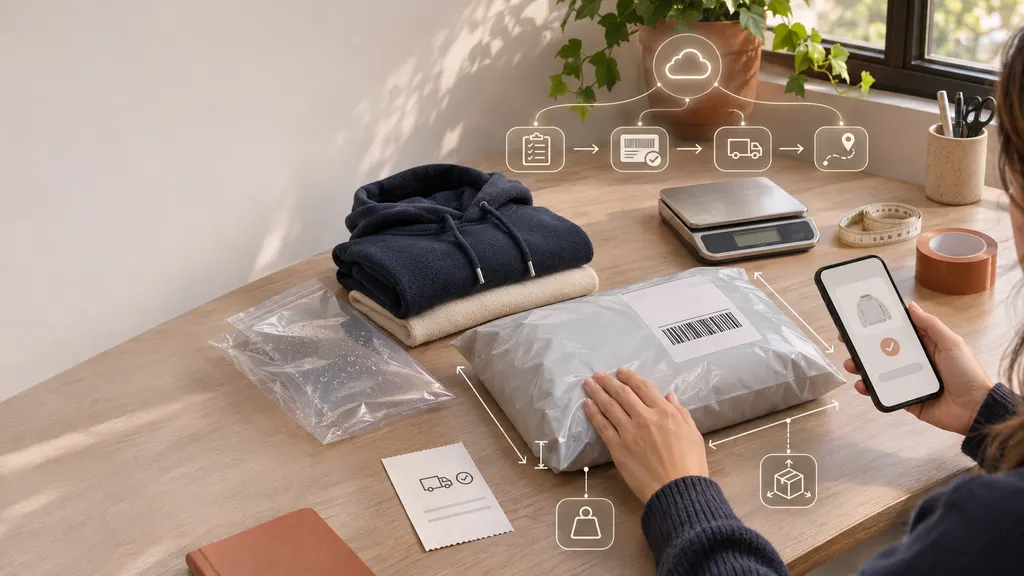
For most clothing sales, the process is straightforward: check the order, prepare the item, weigh and measure the packed parcel, buy or download the appropriate label, attach it securely, hand the parcel to the correct carrier, and monitor the tracking status. Small mistakes—such as using a label for the wrong parcel or dropping a package at an unsuitable location—can create delivery disputes that are much harder to resolve later.
1. Check the Depop order before packing
Start from the sold-item notification and the order page rather than relying only on a message from the buyer. Confirm the item, size, colour, destination, and shipping method. If the order includes more than one garment, check whether the items are being shipped together and whether the selected postage method can accommodate the final parcel size and weight.
Do not send the parcel to an address supplied separately in chat unless the platform’s instructions clearly allow you to update the order. An address mismatch can make delivery evidence difficult to use if the buyer later reports a problem. If the shipping details appear incorrect, contact Depop support through the appropriate order or Help Centre route before dispatch.
Depop shipping arrangements are not identical in every market. Depending on the seller’s location and the order setup, you may receive a platform-generated label or need to purchase postage from a carrier yourself. A seller-arranged shipment usually requires you to enter or confirm tracking information in the relevant order workflow. Do not assume that a tracking number will be added automatically simply because you bought postage online.
2. Choose the right label
A label is only useful when it matches the parcel and destination. Before printing or purchasing it, check these details:
- The recipient’s name and delivery address
- The selected service level and destination country
- The parcel’s packed weight and dimensions
- Any maximum size, contents, or packaging restrictions
- Whether the service includes a scannable tracking number
Use the final packed weight, not the weight of the clothing alone. A hoodie, coat, or pair of shoes can require a different service once packaging is included. If the parcel is heavier or larger than the label allows, the carrier may apply an adjustment, reject it, or delay processing. Depop’s official shipping instructions should take priority over general advice because the available options and seller workflow can change by market.
Print the label at its original size unless the carrier specifically permits another format. Keep the barcode flat, readable, and away from seams, folds, tape, and glossy surfaces that could interfere with scanning. Remove or fully cover old labels and barcodes before reusing a box or mailer. Never place two active shipping labels on the same parcel.
If you cannot print a label, check whether the selected carrier offers a mobile barcode or an approved print-at-location option. Do not create an informal handwritten replacement unless the carrier and the Depop order instructions explicitly support it.
3. Pack clothes so they arrive clean and dry
Clothing normally does not need a rigid box, but it does need protection from moisture, tearing, and compression damage. A practical packing sequence is:
- Inspect the garment. Check that it matches the listing, is free from avoidable stains or odours, and includes any disclosed accessories.
- Fold it neatly. Remove excess air without crushing delicate trims, structured collars, embellishments, or printed areas.
- Add an inner moisture barrier. A clean poly mailer, garment bag, or suitable sealed inner layer can help protect the item if the outer packaging becomes wet. Do not use a barrier that can damage the fabric or trap moisture around a damp item.
- Select an outer package. Use a strong mailer for soft, lightweight garments and a box for shoes, structured pieces, multiple items, or anything that could be crushed.
- Secure the opening. Apply enough packaging tape to keep the parcel closed through normal handling, while avoiding tape over the barcode.
- Test the parcel. Gently press and turn it. The contents should not slide out, puncture the package, or leave sharp edges exposed.
For shoes, clean the soles before packing and protect the pair from rubbing against each other. If the original shoe box is part of the product, place that box inside an additional outer carton or mailer rather than using it as the only shipping package. For jewellery, belts, buckles, and other hard accessories, wrap or isolate them so they cannot mark the clothing during transit.
Avoid adding loose perfume, liquids, food, or unrequested promotional material. Strong scents can create a condition dispute, and some carriers restrict liquids or other contents. If an item is fragile, unusually valuable, or subject to a carrier restriction, check the relevant carrier rules before accepting the sale.
4. Weigh and measure the finished parcel
The correct postage category is determined by the parcel as shipped. Use a household scale for light packages or a suitable parcel scale for heavier orders. Measure the longest, widest, and thickest points after sealing the parcel. Record the result before buying postage, particularly when the package is close to a service limit.
If the packed item is close to the boundary between two services, choosing the next appropriate category can be safer than trying to reduce the packaging by a few grams. The lowest displayed option is not always appropriate if it lacks the required tracking, cannot accept the parcel dimensions, or is unavailable for the destination.
5. Dispatch the parcel and keep proof
Take the parcel to the carrier location or handoff point specified by the shipping method. Ask for a receipt when one is available. The receipt should ideally show the date, carrier, and tracking reference or acceptance scan. Keep it until the parcel is delivered and any applicable transaction issue has been resolved.
A drop-off receipt is not the same as proof of delivery, but it can show that you handed the parcel to the carrier. If the tracking page remains unchanged after dispatch, first check whether the carrier has delayed its initial scan. Retain the receipt while contacting the carrier or Depop support rather than discarding it after the parcel leaves your hands.
When you arrange shipping yourself, enter the tracking number in the Depop order workflow as soon as the platform permits. Copy the number carefully and confirm that it belongs to the correct buyer’s parcel. A single transposed character can make a legitimate shipment appear untracked.
6. Track the delivery after dispatch
Use the carrier’s tracking page as the primary source for operational updates. You can also use a multi-carrier tracking service such as 17TRACK’s tracking page when you want to check a shipment across supported carriers from one interface. Tracking information may not appear immediately after handover, especially before the first carrier scan.
A useful tracking routine is:
- Check that the number is recognised and linked to the intended carrier.
- Watch for the first acceptance or movement scan.
- Tell the buyer about a material delay when the tracking status suggests a problem.
- Do not promise a delivery date that the carrier has not confirmed.
- Save screenshots only as a supplement; retain the original receipt and tracking reference.
International parcels can show additional stages, including export processing, customs clearance, and handoff to a destination-country carrier. A gap between scans does not automatically mean the parcel is lost. Check the service’s normal process and contact the carrier if the status meets its stated investigation threshold.
Common Depop shipping mistakes to avoid
- Using the wrong label: Match every label to one order before sealing the parcel.
- Ignoring packed dimensions: A soft item can become non-compliant when placed in a bulky mailer or box.
- Leaving old barcodes visible: Automated sorting equipment may read the wrong code.
- Sending without a first scan: A receipt is especially useful when the online status does not update promptly.
- Changing the destination informally: Keep shipping details consistent with the order record.
- Overpromising delivery: Transit times can change because of weekends, weather, customs, or carrier disruption.
A simple pre-dispatch checklist
| Check | What to confirm |
|---|---|
| Order | Item, buyer, destination, and shipping method match the order. |
| Condition | The garment matches the listing and is dry, clean, and complete. |
| Package | The contents are protected and the outer packaging is securely sealed. |
| Label | The label is readable, attached flat, and free from competing barcodes. |
| Evidence | You have the tracking reference and will keep the dispatch receipt. |
FAQ
Do I need tracked shipping for a Depop order?
The exact requirement depends on the shipping method, seller location, and current Depop instructions. A tracked service is generally more useful than an untracked service because it creates scan events and delivery evidence. Check the order’s shipping terms before choosing a seller-arranged service.
What should I do if my label has the wrong address?
Do not cross out and rewrite the address unless the carrier and Depop explicitly permit that process. Contact the appropriate support channel before dispatch and request instructions for correcting or replacing the label.
Can I reuse a box or mailer?
Yes, if the packaging is clean, dry, structurally sound, and suitable for the parcel. Remove or completely cover every old label and barcode before attaching the current one.
Why has the tracking number not updated?
The carrier may not have completed its first scan, or the number may have been entered incorrectly. Check the receipt, verify the carrier, and allow for the carrier’s processing pattern before escalating the issue.
Should I photograph the parcel before sending it?
A photo can help you remember the parcel’s condition and label placement, but it is not a substitute for a carrier receipt or valid tracking events. Photographing the sealed package is a sensible extra record for higher-value or easily confused orders.