Happy Returns Locations: Find a Nearby Return Bar and Check before You Go
To find a nearby Happy Returns location, use the official Return Bar locator, enter your address or ZIP code, and confirm that the displayed location accepts your specific retailer return before you leave. Check the address, opening hours, return eligibility, and the instructions issued by the retailer because a nearby Return Bar is not automatically available for every online purchase.
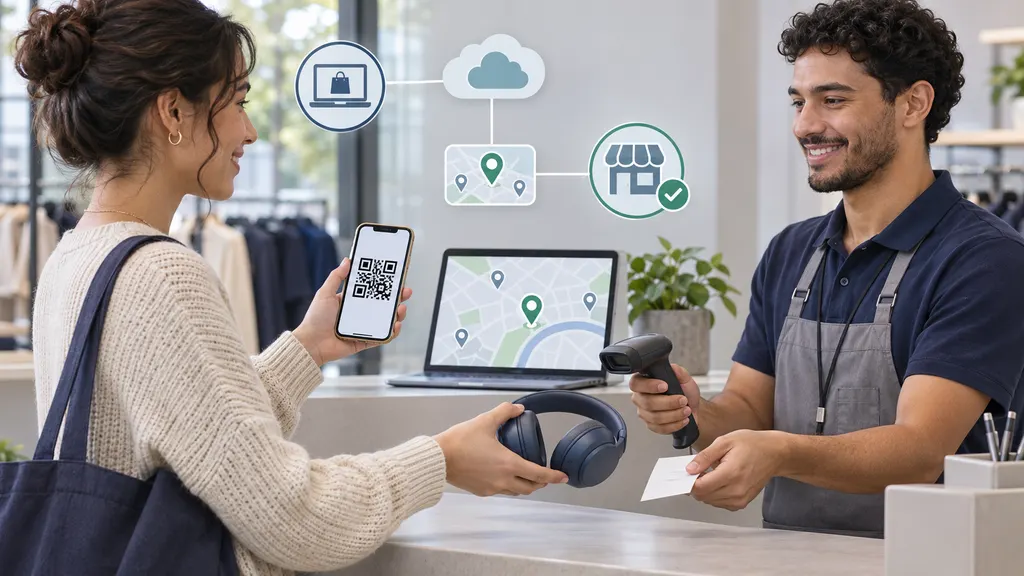
Happy Returns locations are generally designed for returning eligible online orders in person. Depending on the retailer’s return program, you may receive a QR code, return code, or another form of authorization after starting the return online. The exact process, packaging requirements, and available locations can vary by retailer.
How to Find a Happy Returns Location
Start with Happy Returns’ official Return Bar location page rather than relying only on a general map search. A search engine may show a business that previously hosted a Return Bar, a location with limited service, or a nearby store that does not accept your particular return. The official locator is the better starting point because it is intended to connect the location with the Happy Returns network.
- Open the official Happy Returns Return Bar locator.
- Enter your city, state, ZIP code, or another location supported by the search tool.
- Review the results and select the location that is most convenient.
- Check the address and displayed opening information before planning the trip.
- Begin or review the return through the retailer where you placed the order.
- Bring the return authorization, QR code, or other required information to the Return Bar.
If no location appears, try a wider search area or a nearby ZIP code. A missing result does not necessarily mean that Happy Returns has no locations in the broader region; it may reflect the locator’s search radius, local availability, or the return program connected to your order. If the retailer provided a dedicated return link, use that link as well.
What to Check before You Go
The most common mistake is treating the location search as the entire return process. The location only solves the drop-off part. Your order must still meet the retailer’s return rules, and the retailer may require you to initiate the return before visiting a Return Bar.
1. Confirm that the retailer uses Happy Returns
Happy Returns is a return service used by participating merchants. Look for a Happy Returns option in the retailer’s returns portal, order email, or customer service instructions. If the retailer does not offer Happy Returns for your order, a Return Bar may not be able to accept the package even if it is close to you.
2. Confirm that the item is eligible
Review the retailer’s policy for the item you want to send back. Restrictions can apply to final-sale products, personalized goods, oversized items, hazardous materials, worn merchandise, bundled products, or orders outside the return window. These rules belong to the retailer, not to the location finder, so read the order-specific instructions before traveling.
3. Check whether you need a QR code or return code
Some return workflows issue a QR code or another digital authorization after you submit the return request. Keep it accessible on your phone and make sure the screen can be displayed clearly. If the retailer asks you to print a label or include a packing slip, follow that instruction instead of assuming that every Happy Returns transaction is label-free.
4. Check the location’s hours and address
Store hours can differ from the hours shown in older articles, screenshots, or third-party map listings. Confirm the current address and opening information in the official locator or with the host location. If the return is time-sensitive, avoid arriving close to closing time. You may also want to check whether the location has separate service rules for weekends or holidays.
5. Check packaging instructions
One reason shoppers choose a Return Bar is the possibility of completing an in-person return without preparing a conventional shipping box or printed label. That does not mean packaging requirements are identical for every retailer or item. Read the instructions attached to your return authorization. Keep original accessories, tags, manuals, and product packaging when the retailer requires them for approval.
What to Bring to a Return Bar
Prepare the return before leaving home. In most cases, the important information is connected to the online return request rather than to a paper shipping label. A practical checklist includes:
- The item being returned, with all required parts and accessories.
- The QR code, return code, email, or confirmation shown by the retailer.
- Your order details or customer account information if the instructions request them.
- Any required packaging, tags, paperwork, or protective materials.
- A phone with enough battery to display the return information.
Do not leave the item unattended while you search for a code or contact the retailer. If you cannot open the return authorization at the location, ask the host staff what they need and contact the retailer if the issue concerns eligibility or the order record.
What Happens at the Location?
The in-person procedure depends on the retailer’s configuration and the location. A typical workflow begins with presenting the return code or identifying the return in the retailer’s system. The location then receives the item according to the service instructions. You should retain any confirmation, receipt, or tracking information provided after drop-off.
A drop-off confirmation is useful, but it does not necessarily mean that the retailer has completed the refund. The merchant may need to inspect the item, approve the return, and issue the refund under its own policy. The timing and method of the refund should be confirmed with the retailer. If the refund is delayed, contact the merchant first and provide the drop-off evidence.
For ecommerce businesses, this distinction matters. A return location can make the physical handoff easier, but the customer experience also depends on return authorization, item identification, shipment visibility, inspection, refund communication, and exception handling. A convenient drop-off point is only one part of reverse logistics.
How to Choose between Nearby Locations
If several Return Bars appear in the search results, the closest one is not always the best choice. Compare the following factors:
| Check | Why it matters |
|---|---|
| Current address | A small address difference can send you to the wrong entrance or host business. |
| Opening hours | The location may not accept returns at every hour the host business is open. |
| Item requirements | Some items may need a different return method or special handling. |
| Travel convenience | Parking, public transportation, and accessibility can matter more than a small distance difference. |
| Deadline | Allow time for the return request, trip, and any issue at drop-off. |
For a high-value or deadline-sensitive return, save a screenshot of the instructions and record the date and location of drop-off. This creates a clearer record if the retailer later asks when or where the item was handed over.
When a Return Bar May Not Be the Right Option
A Return Bar may be convenient for eligible, manageable items that you can carry to a participating location. It may be less suitable when the item is large, fragile, restricted, or difficult to transport. It may also be unsuitable if the retailer requires a carrier label, a scheduled pickup, an exchange process, or a return to a specific warehouse.
If the locator shows no suitable result, do not send the item to an unverified address. Return it only through the method authorized by the retailer. When instructions conflict, the retailer’s customer service team is the appropriate place to confirm the correct process because the merchant controls eligibility, refund approval, and order-specific exceptions.
A Simple Pre-Trip Checklist
- The retailer’s return portal confirms that Happy Returns is available for this order.
- The item is inside the retailer’s return window and is not excluded.
- The selected location appears in the official locator.
- The address and hours have been checked recently.
- The required code or authorization is ready on your phone.
- Packaging, tags, accessories, and paperwork meet the retailer’s instructions.
- You know how to obtain a drop-off confirmation.
FAQ
Do I need to start my return before visiting a Happy Returns location?
Usually, you should follow the retailer’s return instructions first. Many return programs require an online request or authorization before the item can be accepted. Check the order-specific instructions rather than arriving with an item and no return record.
Do all Happy Returns locations accept every return?
Not necessarily. Acceptance depends on the participating retailer, the item, and the return instructions connected to your order. Confirm eligibility before traveling.
Do I need a box or a printed label?
The requirement can vary by retailer and item. Some workflows are designed to reduce packaging and labeling at the drop-off point, but you should follow the instructions issued for your specific return.
Can I return an item at any nearby store shown online?
Use the official Happy Returns locator and verify the location details. Do not assume that a general map listing or an old location page represents current return availability.
When will I receive my refund after dropping off the item?
The retailer controls refund approval and timing. Keep the drop-off confirmation and contact the merchant if the refund does not progress according to its published policy.
Sources
- Happy Returns Return Bars — official location and service information.
- Happy Returns Returns — official overview of the return service.
- Happy Returns Help Center — official help resources for return instructions and customer questions.